Sweg Motor
Why does my ac synchronous motor hum but not turn? This question often begins with a quiet workshop symptom: the motor vibrates, draws current, and leaves the shaft motionless. The hum may sound steady at 50 or 60 hertz, while the housing becomes warm within minutes. That pattern usually indicates an energized winding without successful starting or synchronization. Possible causes include a jammed load, damaged bearings, incorrect voltage, weak starting components, or a rotor that cannot align with the rotating magnetic field. The exact diagnosis depends on the motor design, supply frequency, and manufacturer’s wiring diagram.
A careful inspection should begin with power isolation, not repeated restart attempts. Turn the shaft by hand after disconnecting power. It should move smoothly, without grinding or tight spots. Check the nameplate voltage, frequency, connections, and rated current. A multimeter can reveal open windings, but resistance readings alone cannot prove that insulation remains healthy. Some motors need a capacitor, auxiliary winding, shaded pole, or external controller to start correctly. I have seen operators blame the motor when a gearbox or seized pump caused the stall. That mistake is easy to make. It is also expensive.
This guide explains practical testing steps, common failure patterns, and replacement considerations. It emphasizes manufacturer documentation and qualified electrical service. If the motor overheats, smells burnt, or trips protection, stop testing immediately. Small details matter. A reliable conclusion comes from measured evidence, not from the hum alone.
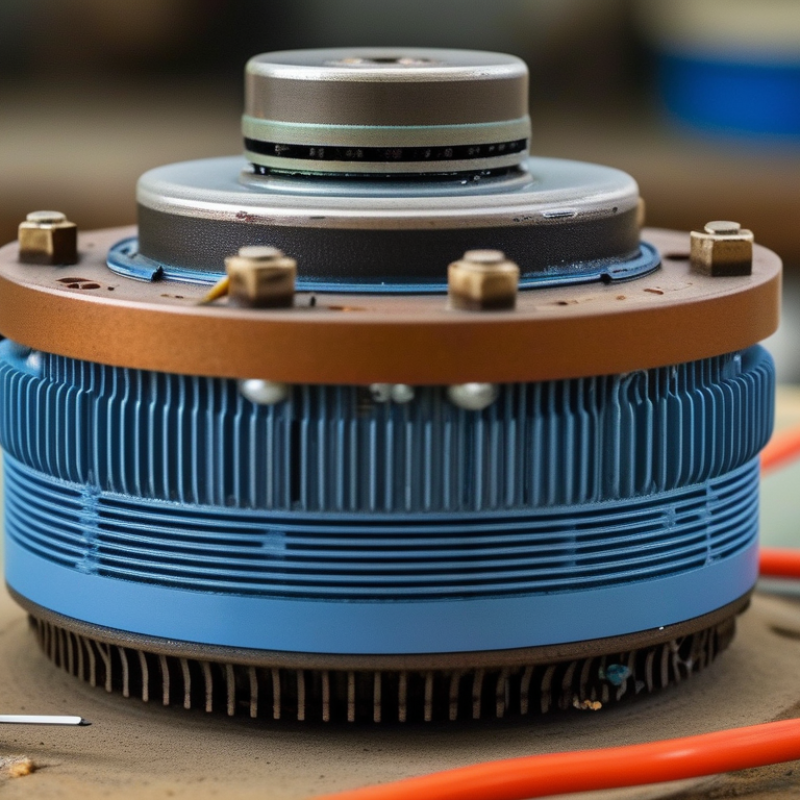
An AC synchronous motor may hum because its stator receives power, while its rotor fails to establish synchronized movement. The magnetic field pulses around the stationary rotor, creating vibration and a low mechanical buzz. The sound can seem harmless. It is not.
In practical troubleshooting, a locked load is a common cause. A tight bearing, bent shaft, or debris may prevent rotation. Some single-phase synchronous motors also need an auxiliary starting circuit, such as a capacitor or shading arrangement. If that part weakens, the motor may hum without turning. Low voltage, incorrect frequency, or a damaged winding can create similar symptoms. The rotor may also be magnetically misaligned after mechanical damage. This detail is easy to overlook.
Switch off power before touching the shaft or terminals. A qualified technician should verify voltage, frequency, winding resistance, and running current with suitable instruments. Compare measurements with the motor’s nameplate data. If the shaft turns freely but the motor still stalls, inspect the starting circuit and rotor condition. If it feels rough or tight, investigate the bearings and connected load. Do not repeatedly energize a humming motor; stalled windings can overheat quickly. My own diagnostic habit is to check the mechanical load earlier, although electrical testing often receives too much attention. That assumption can waste time and damage insulation.
A humming AC synchronous motor is receiving power, but its rotor is not reaching rotation. The sound often comes from energized stator windings vibrating at the supply frequency. A jammed load is one common cause. Check the shaft, coupling, and driven mechanism after disconnecting power. Even a small piece of debris can stop startup.
Low voltage can also create a weak starting field. Measure the voltage at the motor terminals, not only at the wall outlet. A failed starting capacitor, damaged auxiliary winding, or open shading ring may prevent the rotor from moving. Some synchronous motors need an external starting method before they can lock onto the rotating magnetic field. The main winding may hum normally while the rotor remains still. It happens more often than many inspections suggest.
Bearings deserve close attention. Turn the shaft by hand and feel for roughness, tight spots, or side movement. A bent shaft can produce a deep, uneven hum. Inspect wiring for loose terminals, burnt insulation, and incorrect frequency or voltage connections. I have seen technicians replace a motor too quickly, then discover a seized gearbox. That mistake is easy to make. Do not repeatedly energize a stalled motor; heat can damage the winding insulation within minutes. Use a qualified technician for live testing, insulation checks, and current comparison. The measured current should be compared with the motor’s rated value and the manufacturer’s service data.
Use these reference values during troubleshooting: excessive voltage deviation, phase-voltage unbalance, locked-rotor current, and low insulation resistance can all contribute to humming or starting failure. Actual limits depend on the motor design, operating voltage, and applicable standards.
An AC synchronous motor may hum when it receives power but cannot start rotating. Disconnect the supply before touching terminals. Verify zero voltage with a suitable meter, not only the wall switch. Check the rated voltage against the measured supply. A weak supply can create a low hum and poor starting torque. Inspect the shaft by hand. It should turn smoothly without scraping, tight spots, or a seized load.
Wiring deserves careful attention. Compare each terminal with the motor’s wiring diagram, and look for loose connectors, darkened insulation, or broken wires near the strain relief. If the motor uses a starting or phase-shifting capacitor, inspect it for swelling, cracks, or leakage. Measure its capacitance with a proper meter after discharge. A replacement must match the specified capacitance and voltage rating. Installing a similar-looking capacitor can worsen the fault. I have seen this mistake cause repeated humming and extra heat.
Tips: Stop repeated restart attempts. They can overheat the winding. If the capacitor tests correctly, check the switch, control circuit, and mechanical load. Listen for a steady hum, then note whether the housing becomes hot within minutes. That detail helps separate electrical and mechanical problems. When measurements conflict with the diagram, pause and recheck the model data. A qualified technician should handle live testing and winding repairs.
When an AC synchronous motor hums but does not turn, it may receive power without developing enough starting torque. Disconnect the supply and wait for stored electrical energy to discharge. My first assumption is often a seized bearing, but that shortcut can mislead. Check the terminal connections, supply voltage, and winding resistance against the motor’s technical data. Unequal resistance readings suggest a winding or connection problem. Insulation testing should be performed by a qualified technician with suitable equipment.
With power isolated, turn the shaft by hand. It should move smoothly, without scraping, tight spots, or excessive side play. Listen for rough bearing noise. A dry bearing may feel acceptable at first, then bind when warm. Inspect the shaft for bending, rust, or a damaged key. I once blamed the motor too quickly; the shaft was slightly misaligned and rubbing the housing. Small errors matter.
Separate the motor from its driven load when practical, then test it briefly under controlled conditions. If it starts unloaded, inspect the pump, fan, gearbox, or belt for seizure and excessive resistance. Check couplings for angular misalignment and confirm that the load has not jammed. Measure running current and compare each phase with the rated value. A high reading can indicate overload or stalled rotation. Do not repeatedly energize a humming motor; heat can damage the windings quickly. If the motor still hums without its load, stop testing and arrange professional electrical and mechanical inspection.
An AC synchronous motor may hum because it receives power but cannot develop starting torque. Common causes include a seized bearing, blocked rotor, weak capacitor, incorrect voltage, or damaged windings. A humming sound can also indicate a mechanical load that has become too heavy.
In field service, I isolate the supply before touching the motor. I check the shaft by hand, inspect wiring, and measure voltage with a certified meter. Stop there. Never force the rotor while power remains connected. Capacitors can retain dangerous energy, so a qualified technician should discharge and test them properly. Burn marks, melted insulation, or a sharp electrical smell usually suggest internal damage rather than a simple adjustment.
Repair may be practical when the bearing, capacitor, terminal, or obstruction is at fault. Replacement is often safer when the winding insulation fails or repair costs approach the price of a new motor. Match voltage, frequency, shaft size, rotation, and mounting dimensions carefully. A motor that fits physically may still be electrically unsuitable. I once underestimated a stiff gearbox and replaced a motor unnecessarily; that mistake changed my inspection routine. Test the complete assembly under normal load, while monitoring noise, temperature, and starting behavior. Don’t rely on sound alone.
| Observed Condition | Likely Cause | Recommended Diagnostic Check | Repair or Replacement Action | Safety Risk | Practical Guidance |
|---|---|---|---|---|---|
| Motor hums immediately but the shaft remains stationary |
|
|
Remove the obstruction or correct the load condition. If electrical values are correct but the motor still cannot start, professional testing of the rotor, stator, and starting circuit is required. | High | Do not leave a stalled motor energized. A stationary motor can draw excessive current and overheat its windings. |
| Motor hums, becomes hot, and trips a protective device |
|
Measure voltage at the motor terminals under load and inspect protective-device operation. Insulation and winding-resistance tests should be performed by a qualified technician. | Correct the supply or mechanical overload. A winding fault generally requires professional rewinding or motor replacement, depending on the motor’s condition and availability of parts. | High | Repeated resetting of a breaker or thermal protector can worsen damage and create a fire hazard. |
| Shaft is difficult to rotate when power is off |
|
With the equipment isolated, rotate the shaft manually and listen for grinding, scraping, or uneven resistance. Check for visible shaft misalignment. | Replace serviceable bearings where the motor construction permits it. If the rotor or stator is damaged, replacement is often more reliable than continued operation. | Medium | Do not apply lubricant unless the motor manufacturer’s service instructions specify the correct type and quantity. |
| Shaft rotates freely, but the motor only vibrates or buzzes |
|
Compare terminal connections with the wiring diagram. Confirm the rated voltage, frequency, phase arrangement, and any required control components. | Correct wiring only after power has been isolated and verified absent. Replace damaged connectors or control components. Do not change connections by trial and error. | High | Electrical testing should use appropriately rated instruments and should be carried out by a qualified person. |
| Motor starts only after being spun by hand |
|
Identify the exact motor type and inspect the wiring and starting components. Compare measured component values with the manufacturer’s specifications. | Replace a failed, correctly rated starting component. If the motor is not designed for manual starting assistance, do not continue using this method. | High | Manual spinning near exposed moving parts presents entanglement and electric-shock hazards and is not a suitable repair. |
| Motor runs but makes abnormal noise or has strong vibration |
|
Inspect mounting bolts, couplings, fan covers, and the driven equipment. Check whether vibration changes with the load disconnected. | Tighten or realign components according to service instructions. Replace worn bearings or the motor if vibration remains excessive after mechanical corrections. | Medium | Continued vibration can damage bearings, couplings, insulation, and connected equipment. |
| Motor has a burnt odor, discolored insulation, or smoke marks |
|
Isolate the motor and allow it to cool. Inspect ventilation openings and wiring visually. Do not re-energize until insulation and winding tests have been completed. | Repair may be possible after a qualified assessment, but replacement is usually preferred when insulation damage is extensive, the core is damaged, or repair cost approaches replacement cost. | High | Smoke or a burnt smell indicates a potentially serious electrical fault. Keep the equipment isolated and investigate the cause before reuse. |
| Motor repeatedly fails after repair |
|
Review the complete installation: load torque, duty cycle, ambient temperature, enclosure, voltage, frequency, alignment, and protection settings. | Select a replacement using matching voltage, frequency, power, speed, mounting dimensions, shaft dimensions, duty rating, and environmental protection requirements. | Medium | Replacing the motor without correcting the application or installation problem may result in another premature failure. |
| Motor is exposed to moisture, dust, or corrosive conditions |
|
Inspect the enclosure, cable glands, terminal box, seals, and ventilation paths. Test insulation resistance only with suitable procedures and equipment. | Drying, cleaning, sealing, or component replacement may restore service if damage is limited. Replace the motor when corrosion or insulation deterioration is severe. | High | Never energize a wet motor without a qualified inspection. The required enclosure and environmental rating must match the installation. |
| Choosing repair instead of replacement | Repair is generally more suitable when the fault is localized and the motor has a sound frame, shaft, core, and insulation system. | Obtain a professional condition assessment, including winding, insulation, bearing, shaft, and rotor checks where applicable. | Repair may include bearing replacement, terminal repair, cleaning, alignment, or winding work. Use components with equivalent electrical and mechanical ratings. | Medium | Ask for test results after repair, including insulation condition, operating current, temperature behavior, and vibration where relevant. |
| Choosing replacement instead of repair | Replacement is often preferable when the motor has extensive winding damage, severe corrosion, damaged laminations, unavailable parts, or uneconomical repair costs. | Record the original nameplate information and measure mounting, shaft, and connection details before ordering. | Match voltage, frequency, phase, rated power, speed, torque requirements, duty, mounting arrangement, shaft size, enclosure, insulation class, and protection requirements. | Medium | Confirm compatibility with the driven equipment and control system. A motor with similar power alone may not be a suitable replacement. |
| Safe shutdown and restart procedure |
|
Turn off the disconnecting means, isolate all energy sources, apply lockout/tagout where required, verify absence of voltage, and secure the driven equipment. | Reinstall covers and guards, check terminal tightness, confirm free rotation, and conduct a controlled test run after the work is complete. | High | Only qualified personnel should perform live electrical measurements or internal motor repairs. Follow applicable electrical and workplace-safety regulations. |
It receives power, but the rotor cannot reach rotation. A jammed load, weak voltage, or failed starting part may be responsible.
Disconnect the supply and verify zero voltage with a suitable meter. Do not trust the wall switch alone.
With power isolated, turn the shaft by hand. It should move smoothly, without scraping, tight spots, or side movement.
Yes. Measure voltage at the motor terminals, not only at the outlet. Compare the reading with the motor’s rated voltage.
A failed capacitor can prevent starting or phase shifting. Look for swelling, cracks, or leakage, then measure capacitance after safe discharge.
Check loose terminals, broken wires, darkened insulation, and incorrect voltage or frequency connections. Compare every terminal with the wiring diagram.
Separate the motor from the pump, fan, gearbox, or belt when practical. If it starts unloaded, inspect the driven equipment for seizure or misalignment.
Rough noise, rubbing, rust, bending, or a tight spot can indicate bearing or shaft trouble. A dry bearing may bind after warming.
No. Repeated attempts can overheat the windings within minutes. Stop when the housing becomes hot.
Use one for live testing, insulation checks, winding repairs, and current measurements. My first guess can be wrong. Small details matter.
If you are wondering, “why does my ac synchronous motor hum but not turn,” the problem usually involves insufficient starting torque, incorrect wiring, a weak or failed capacitor, low voltage, or an overloaded mechanism. An AC synchronous motor may produce a humming sound when its windings are energized, yet remain stationary if the rotor cannot start moving or reach synchronization. Dust, mechanical blockage, worn bearings, or a seized shaft can also prevent rotation and increase the humming noise.
Begin by disconnecting power and checking the supply voltage, wiring connections, terminals, and capacitor for visible damage or incorrect installation. With the motor safely isolated, inspect whether the shaft turns smoothly by hand and determine if the connected load is jammed or too heavy. Electrical tests should be performed with suitable equipment and proper precautions. Depending on the findings, the solution may involve correcting wiring, replacing the capacitor, removing a mechanical obstruction, servicing bearings, reducing the load, or replacing the motor if its windings are damaged.
